Showing posts with label Compost. Show all posts

Wednesday, March 28, 2012

Ready for Radishes

I love radishes. Not the tough, woody, and "hot" store-bought varieties. I'm talking sweet, crisp, and "sharp" home-grown radishes.

When I first started gardening 8 years ago, I heard and read that radishes were one of the easiest vegetables to grow. A real no-brainer. Eager for a quick success, I planted radish seeds and crossed my fingers. What happened? Not much other than disappointment. I grew lots of green radish tops but they all had thin and spindly radish roots. No round edible radishes.

Not one to be easily deterred in the garden, I planted a second packet of radishes and hoped for better results. What happened this time? Same poor results, and an extra dose of disappointment. So much disappointment that I walked away from the radish game. Threw in the towel. Hung up my cleats.

After doing some reading, thinking, and head scratching, I eventually identified my previous mistakes. In past years I planted my radish seeds in nitrogen rich dirt or soil. I also didn't water very often after germination. These two factors almost certainly resulted in poor radish growth. Radishes won't develop large flavorful roots if they have too much nitrogen, but they will grow lush foliage. Radishes are also best when grown quickly. What does that mean? Radishes need a steady supply of water to guarantee rapid growth. Most great radishes will go from seed to harvest to table in less than 1 month. They need lots of moisture.

In recent years and particularly this spring, I think I finally figured out how to grow great radishes. Here are the main factors I try to control:

1. Location - I plant my seeds in a large (24" diameter), deep pot in full sun. The pot provides plenty of space for root growth. It is very thick glazed ceramic with 3 drain holes on the bottom. It holds moisture very well, but also drains properly.

24" diameter ceramic pot filled with well-aged compost and radishes ready for harvest.
2. Soil - I like to use well-aged compost. Not fresh stuff, I'm talking year-old rich compost that isn't loaded with nitrogen. It drains well, contains all nutrients and doesn't require additional fertilizer or minerals, and does the trick for me. I fill up my ceramic pot with 100% compost.

3. Seed spacing and planting - I generally scatter seed on the surface of already-moist compost. I'm not overly concerned with rows or spacing, as long as the seeds aren't clustered together. Then I take a handful of dry compost, scatter that over the seeds, then water again. My top layer of compost is not much more than a dusting. Some seeds are usually slightly exposed. No big deal.

4. Moisture - I keep my radishes well watered. Every day for the first week after sowing. Every third of fourth day after germination. No extra water if it rains. This sounds like a lot of water, but good compost drains rapidly yet still manages to retain the perfect amount of moisture.

Blanche Transparente radishes peaking out of the compost. They are a long white, tapered variety of radish also called White Icicle. Note how the radishes are starting to crest out of the compost.
5. Thinning - Radishes don't require tremendous space but also don't like loads of competition. I will usually thin my seedlings if they are stacked up too tightly.

6. Harvest - Harvest early. Most varieties are ready within 30 days. They taste fresh, crisp, and only mildly spicy when young. Use your best judgement, but don't wait too long before harvesting. I have found that most radishes are not like fine wine...they won't get better with age. Older radishes are tough, woody, and have an overbearing heat to them.

Blanche Transparente radishes on my cutting board. The largest radish was over 7" long, the shorter radishes about 4" long. They were crispy, mild, sweet, and tasted like proper radishes.
7. Varieties - Round; thin; tapered; cylindrical; red; pink; white. You name it, it probably exists. Experiment to find the varieties that you enjoy eating and grow well for you.

These are just my personal observations about growing radishes. Probably too much info and maybe overkill. I still know many gardeners who have great soil, simply toss in a few seeds, water well, then harvest. Simple is always best in the garden. Experiment. Find out what works best for you. Then try to simplify. The only thing left to do after that is eat and enjoy.

Bon Appétit!

Sunday, February 19, 2012

Broccoli Double Vision

I've been eating lots of hefty carrots recently. This should be evident by my last blog post. Carrots contain Vitamin A, which is an essential nutrient for good vision. Despite my prodigious intake of these health-supporting wonders, I discovered that something was wrong with my eyesight this afternoon.

After lunch, I walked out into the rain to plant some radishes in my garden. I was a few feet from my potted Calabrese broccoli when I started seeing double. I could've sworn I harvested my broccoli last month, but sure enough...side shoots of broccoli had sprouted up everywhere! Double broccoli!!

Side shoots of Calabrese broccoli (left and bottom). I harvested the central head of broccoli on January 19. Notice the off-white area near the center of the picture where I cut the central head with a small knife. Exactly one month later I harvested the side shoots.
Calabrese broccoli is no one trick pony. It grows not once, but twice. Exactly one month had passed from the time of my initial harvest to today's second harvest. Here's a close-up view of some side shoots.

Secondary shoots of Calabrese broccoli growing from the side of a potted plant.

Because of my relatively care-free harvest and positive experience with broccoli this year, I am planning on growing multiple varieties next fall. In addition to Calabrese, I will be sowing seeds of Super Rapini broccoli raab and Romanesco broccoli.

Broccoli varieties for future planting at .09 Acres.

I definitely recommend home-grown broccoli for every gardener, beginner or advanced. You will be pleasantly surprised with your harvest if the plant is grown in compost-rich soil and kept moist. Here's a list of the pros and cons of growing broccoli:

PROS:
  • large central heads of sweet, tender broccoli
  • secondary harvest of side shoots 3-4 weeks after main harvest
  • unbeatable flavor compared to insipid store-bought broccoli
  • extremely tolerant of hard frosts and variable weather
  • can be grown in large pots
  • beautiful blue/green foliage

CONS:

  • young plants are prone to attack by caterpillars
  • needs steady supply of water as a seedling
  • large size when mature (appx. 36" in diameter in my garden) 
  • long time from seed to harvest 

Saturday, October 15, 2011

Everbearing Raspberries

Summer has come and gone, but the flavors of summer can still be enjoyed in early fall if you plant everbearing raspberries in your yard.

Kiwi Gold, Fall Gold, and Heritage Red raspberries harvested October 15.
I planted a short 20-foot row of Kiwi Gold, Fall Gold, and Heritage Red berries when I first started developing my backyard garden. It didn't take long for the first few berries to show up, but now that the canes have matured and grown for a few cycles I am harvesting more and more berries each day.

The name "everbearing" is a bit misleading because they typically provide two large crops of berries rather than a continuous harvest. Kiwi Gold and Fall Gold are exceptionally sweet, and the Heritage Red berries have a classic raspberry flavor. I personally prefer the gold varieties, my wife likes the red berries, and the dogs will eat all three varieties without hesitation.

Gold and red raspberries. The berry in the top right looks a bit over-ripe and mushy. That's what I get for harvesting when it was nearly dark outside.  
I definitely recommend all three varieties for the home garden in the mid-Atlantic. I'm sure other varieties are well-suited to this climate, but these three have delivered well in Newport News, Virginia. I have ten suggestions for growing raspberries based upon a my brief personal experience tending to my berry canes:

1.  Make sure your planting site has good sun exposure and drainage.
2.  Keep your planting site weed-free.
3.  Berry canes need support -- plant against a trellis, tie loosely to wires.
4.  Water well during dry spells.
5.  Feed your plants with rich, organic compost.
6.  Keep your canes mulched with a layer of wheat straw or other suitable mulch.
7.  Determine if you want a single large crop or two crops per year. This will dictate how and when the canes should be pruned.
8.  Dispose of pruned canes to prevent the spread of disease.
9.  Enjoy every single bite. Homegrown berries are superior to anything you can buy in the store.
10.  And don't forget to share the harvest! What goes around comes around...

Friday, July 8, 2011

Propagating Figs

Back on March 28, I started to root approximately 100 fig cuttings in plastic 16 ounce cups filled with moist perlite. I used dormant cuttings ranging in size from 8"-12". I was moderately successful rooting Celeste figs in previous years, so this year I was excited to get access to a wide variety of figs including Blue Celeste, Panache, Alma, Hardy Chicago, Strawberry Verte, Violette de Bordeaux, Osbourne Prolific, and Italian Golden Honey. It's been just over 3 months since I started the cuttings, and to date I have successfully rooted many cuttings. I am now in the process of transitioning the rooted cuttings from perlite to compost in plastic nursery pots to grow in the shade until they are established. The following pictures show the process:

Assorted fig cuttings in perlite.  This picture was taken on March 28.  I kept them inside my unheated garden shed until the weather warmed, then I moved them outside onto a table beneath a shady tree where they stayed for a few months.  The rooting process really speeds up in warm/hot humid weather.  This makes the process easy and successful in southeastern Virginia.
Here is a rooted cutting of Hardy Chicago on July 7.  Notice it has lush foliage.  Here's where it gets tricky.  Foliage growth is not necessarily a sign that the fig has rooted.  Sometimes a cutting will grow leaves but not roots.  This is why potting in clear plastic cups is an advantage.  It's much easier to see if and when roots have grown.
Check out the root growth in the bottom of the plastic cup.  I decided to transition this cutting from perlite to  compost in a plastic pot because of the strong root growth AND new foliage.
Here's a photo of the rooted cutting after I removed it from the cup.  The roots are holding the perlite together.  
I put a few inches of compost in the bottom of a pot and place the rooted cutting into the pot.  The perlite usually crumbles apart but it's not a big deal.  I like to include all the perlite from the cup because I believe it helps to transition the cutting to the new potting media. I use the inside of an old wheel barrow as my potting area. 
I make sure the cutting is vertical and then I add compost to the pot until it is even with the rim. I never compress the compost around the new cutting because I believe it can damage the young roots. Compost is light and fluffy and the rooted cuttings seem to respond well to it.
Here is a final picture of the new Hardy Chicago fig.  It's been watered and labeled.  A good labeling system is very important because it's easy to get them all mixed up when you have dozens of cuttings and no labels.  I also do not add any fertilizer.  The compost provides sufficient nutrients for the remainder of the year. This cutting will now join the others in the shady canopy of a massive crepe myrtle.  Once the fig shows strong new growth, I'll move it into a sunnier location.  As long as I keep my cuttings watered, they'll grow 4-5 feet by the time October rolls around and temperatures cool down.
Propagating new fig trees from cuttings is a fairly easy process. The hardest part is waiting!  I encourage you to give it a try. Before you know it, you'll have a yard filled with fig trees.

Thursday, June 9, 2011

Early June

I'm back.  It's been almost 2 months since my last post.  Too long. Figured I'd do a big pictures post from the yard.  It's been an interesting and productive Spring, with a few setbacks as well. Generally speaking the garden is doing great.  Let's start with the good then I'll move on to the bad and ugly.  I successfully saved seed from my Vates kale and two varieties of Swiss chard.  They get tall when they bloom.  I'm talking 6-feet tall!  I added about 4" of fresh compost to each bed and built a small extension designated for herbs. Cucumber production has been nothing short of amazing.  I've got 5 Burpless plants in the ground and I'm pulling about 8 cukes/day.  I planted borage as a companion plant to my tomatoes, and it  is growing very well.  Beautiful flowers and they are edible too.  Peaches are hanging from the tree, the pomegranate is still in bloom. Raspberries were a tasty treat for about 3 weeks and are slowing now, but the blackberries are starting to kick in.  Figs have also put on new growth and, more importantly, many figs.  Not as many as I hoped for, but I pruned them back in early spring to encourage more branching for larger future harvests.  The fig espalier is developing fairly well.  I also just finished harvesting approximately 50 heads of Inchelium Red garlic and they are drying in my shed.  That's a short version of the good.

Now for the bad.  My precious, beloved, sacred, and coveted heirloom tomatoes are taking a beating.  They grew well for the first 6 weeks after I transplanted them into the garden, and they grew large.  I'm talking appx. 4-5 feet tall.  Then I started noticing what I believe to be blight.   It first appeared on a few leaves, then a stem, a truss of tomatoes, an entire stalks.  I quickly pruned those areas, sterilized my pruners, and then moved to the next plant.  But it kept moving.  So this past weekend and evening I ripped out 5 of my 7 in-ground tomatoes.  2 German Johnson, 1 Black from Tula, 1 Bull's Heart, and 1 Marvel Striped. I don't know why it hit so hard.  I immediately tossed them in the garbage bin.  I've been careful about watering, 2 doses of organic foliar feed (spaced 4 weeks apart) in the early morning, etc. etc., but I guess a large harvest like last year wasn't meant to be.  I'm planning on purchasing a few more plants and probably dropping in a few seeds as well, but I'm flat out bummed.

And the ugly.  Despite my best attempt at smothering the grass, it's back.  And lots of it.  Multiple layers of cardboard, 4-5 inches of mulch, periodic hand weeding of the errant shoot of grass, all for nothing.

Alright, enough gibberish!  Let's do the photos, shall we?
This is a mix of the good and the ugly.  Figs down the left, raised beds front and center, berries/peach/pomegranate on the right.  Oh yeah, and grass everywhere...son of a...
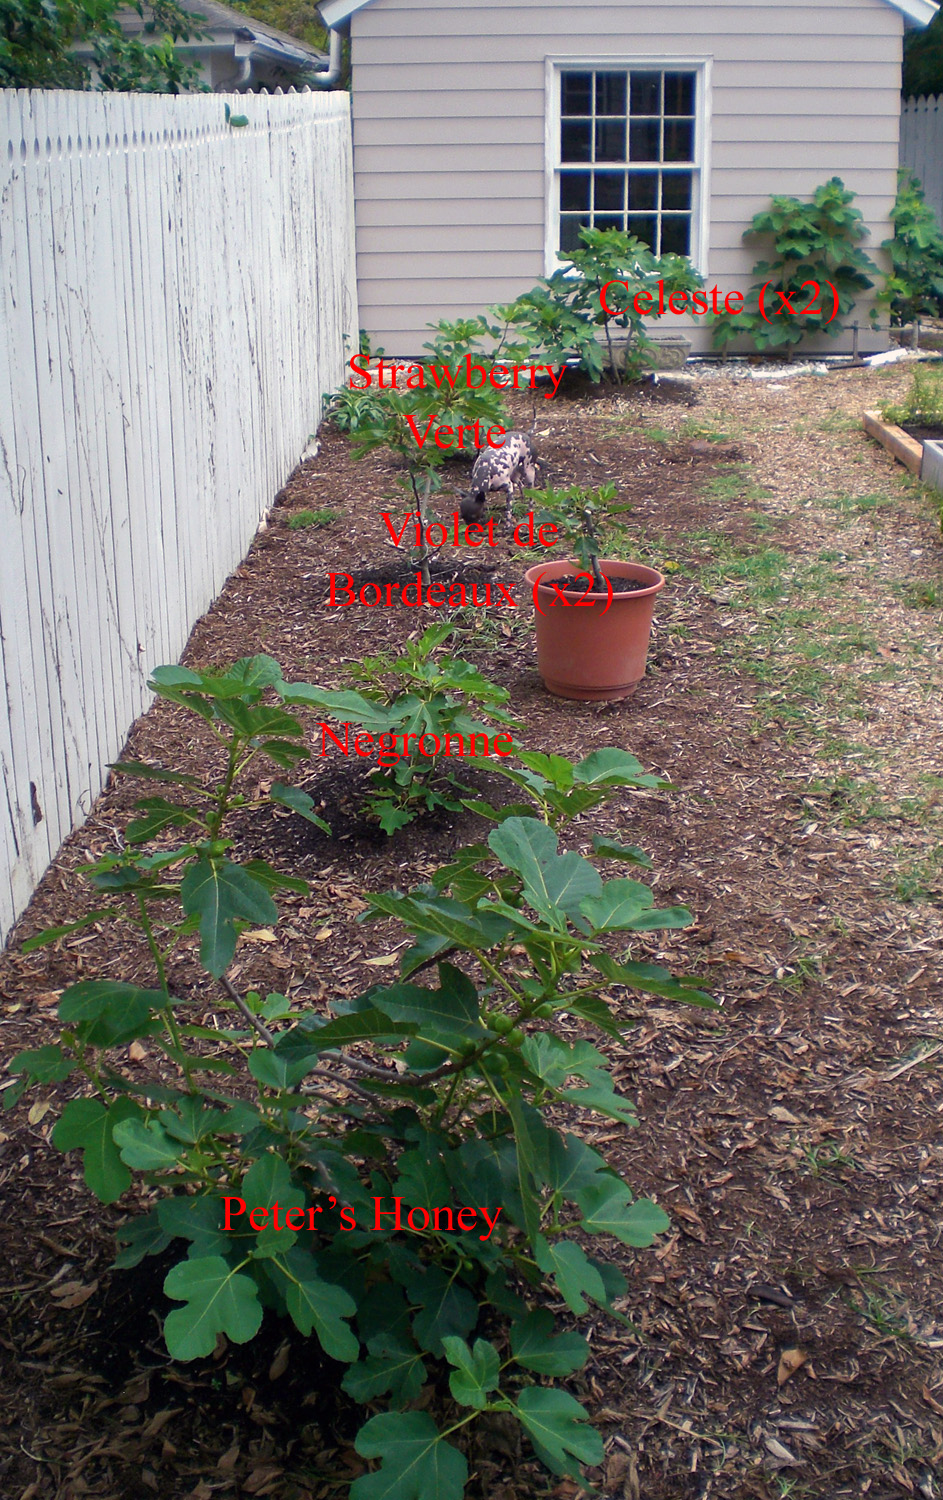
Row of figs down the left wall of the yard.  They are all fairly small, but are adapting well to their permanent location.  I grow a mix of brown, purple, and green figs.   If you look closely, you can spot Scout.  She's the hairless wonder dog.
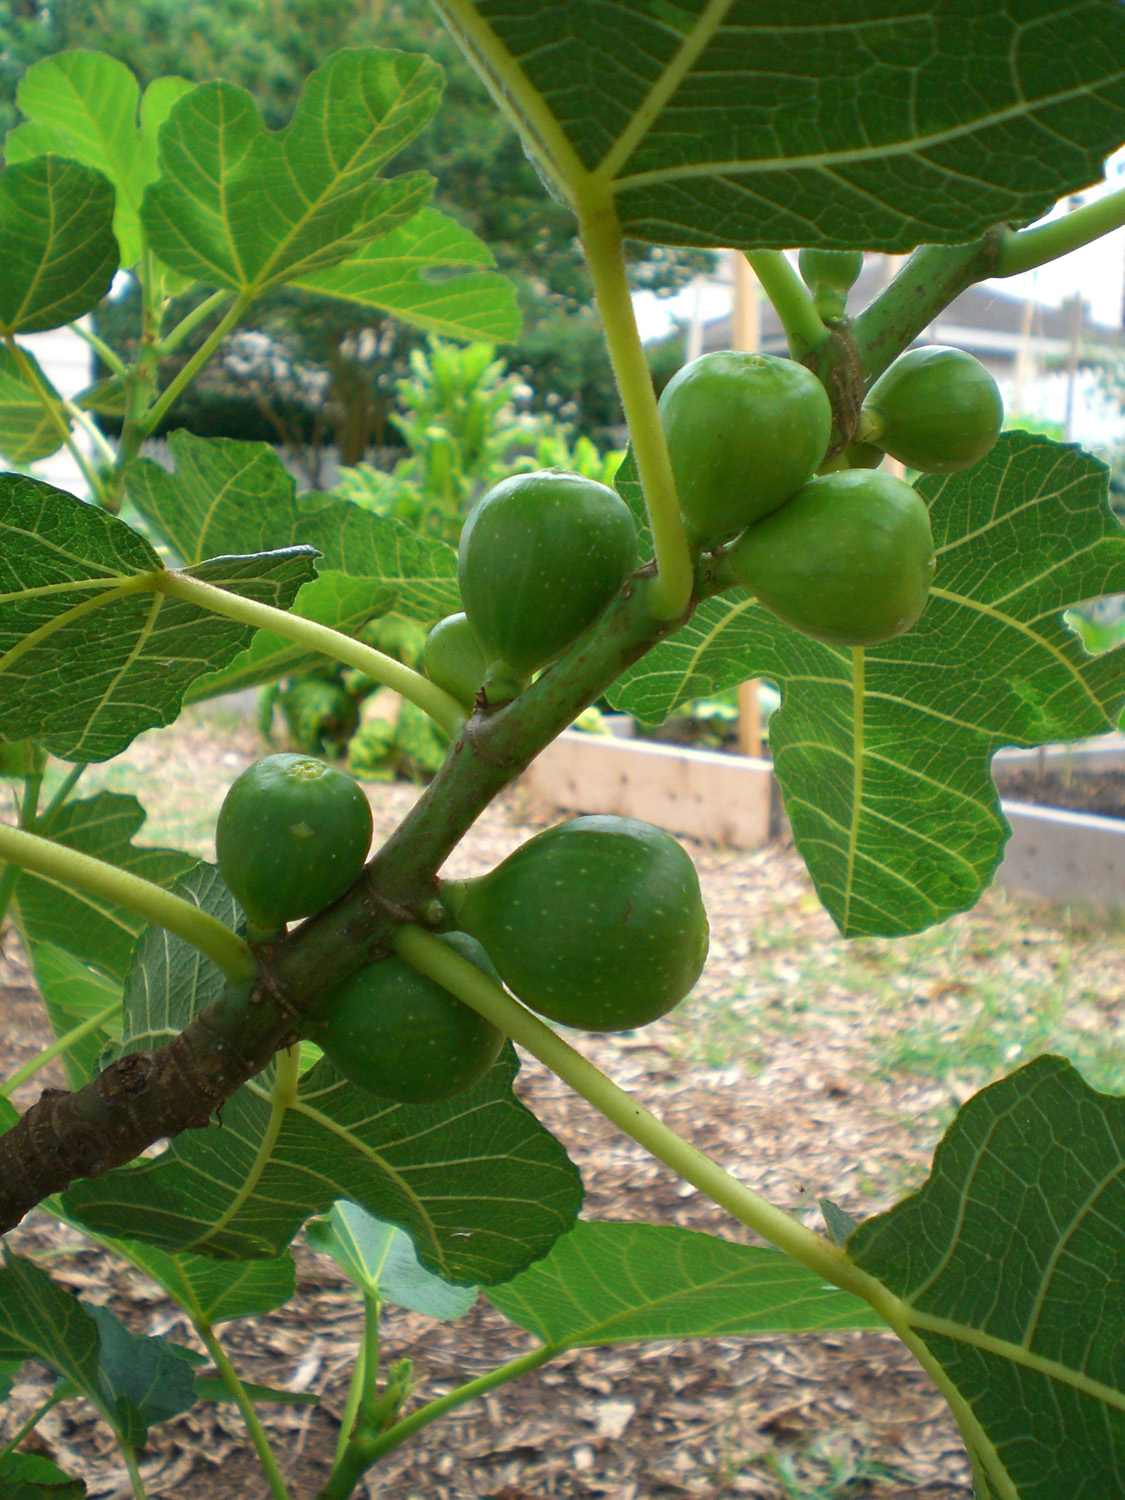
Peter's Honey fig.  In some areas this plant is putting out 2 figs per leaf, and I don't think that's very common. I'm not complaining.
Violet de Bordeaux figs.  I will pick individual ants off the tree to protect these, partly because I'm crazy but mostly because these things are heavenly.
The Red Haven peach tree is getting very large.  I pruned it heavily this winter and again about 3 weeks ago, and it keeps on growing.  I also thinned the fruits a while ago, but it's still hanging about 25 peaches.
Overhead view of the Red Haven peach tree showing the main scaffold limbs.  I'm trying to maintain an open center to allow light in and air to circulate.
I haven't sprayed this tree with a single thing this year and it still looks healthy.  I hope that holds up for the rest of the year.
The Russian Pomegranate also likes its sunny but sheltered location.  It's approximately 7' x 7' and was covered in blooms for 3 weeks.
A tiny pomegranate and a few blooms in the background.
This is a young Haku-Botan pomegranate tree, courtesy of Sybil Mays.  It will eventually produce yellow/gold pomegranates.  Sybil, this is the little plant you dug up from your side yard.  It has recovered and grown ALOT!
It's a cucumber jungle out there.  By now they've established very deep roots and don't show much wilting during the hottest (98 degrees) driest weather this year.
These beasts make a mean cucumber salad.
Ouachita blackberries beginning to ripen.  I'm not sure exactly what happened (or didn't happen), but I think poor or incomplete pollination led to irregularly shaped berries.  Look closely in the picture and you'll see what I'm talking about.
Almost ready.
All the literature says that borage flowers have a cucumber taste.  I disagree.  They taste like borage flowers.  Not really cucumbery, but just a general leafy green pleasant flavor.  I grew these as a companion plant for the tomatoes, but it clearly hasn't helped this season.  
Don't ask me how this partially ripened black cherry tomato tasted.  I wouldn't know.  My dog Diego ate it so you'll have to ask him.  
When most people draw a picture of the devil, they draw a red devil.  The devil is NOT red.  The devil is green.  Check out this mix of Bermuda grass and some other green beasts that are growing well despite Operation Smother.
Bermuda grass a-creepin'.  This is the aforementioned ugly.  I plan on pulling everything I can by hand rather than using some ineffective organic herbicide or crazy poisonous herbicide.  I do not want to mow this back yard ever again.  
I'll post again soon with pictures of the garlic harvest as well as the fig espalier.  How are things growing in your gardens?  If you are fortunate enough to have a bumper crop of heirloom tomatoes later in the summer, I'll likely be begging at your front door. That's a promise.

Saturday, April 9, 2011

Busy Day, Pictures Tomorrow

I was hoping to put up a full post today, but the yard won.  Clearing beds, pulling weeds, harvesting kale and carrots, shoveling and spreading 2 cubic yards of compost, and prepping for planting.  It was a productive day and I was outside until dark but I never took a picture.  I'll snap a bunch tomorrow so check back then, especially if you want to see the "mustache" that I harvested.

Sunday, February 27, 2011

A Post About Compost

I finally got some motivation this weekend and built a compost bin for the garden.  I pulled out some salvaged lumber and bought a few pieces from the hardware store and went at it.  I used outdoor wood screws instead of nails because I had a bunch leftover from when I built the raised beds.  I didn't follow any plans, but I didn't deviate far from the norm.

New compost bin.
The bin is 4 feet wide, 4 feet tall, and 3 feet deep.  I was going to build it 4 x 4 x 4, but then it would've been difficult to turn the compost in the back of the bin.  It also would've partially obstructed access to the nearby table.

Front view of the compost bin with slats partially removed.
I built two sets of guides to secure removable wood panels on the front.  The panels slide into the guides and stack on top of each other. I hope this will facilitate easy access to the finished product.  Here's a picture that should make more sense than my rambling description.

Guides for front panels of compost bin.
A few years ago my parents gave me a compost tumbler for Christmas.  The thing works great and produces really nice compost in a fairly short amount of time.  The only real drawback is the size of the unit.  It's not capable of producing large volumes of compost that I need in the new garden, hence why I built this large bin.  I plan on keeping the compost tumbler to produce smaller batches on the side and ultimately to store any extra compost from this large bin if I don't use it all at once.  Currently the compost tumbler is about half filled with a great batch of compost that will find its way into the garden in a few weeks.

New compost bin next to the compost tumbler.  Note the large difference in size.  
I read that it's a good idea to coat the wooden compost bin with a wood preservative or stain to prevent fast deterioration.  None of the wood is pressure treated and only some of it is rot-resistant hardwood. I would really like to get some feedback on what coating(s) others have used to seal wood in a compost bin.  I don't want it to deteriorate within a year or two.