Monday, February 28, 2011

Extending the Raised Beds

I took advantage of the nice weather this weekend to do something that was inevitable.  I extended my raised beds by joining some of them together.  Instead of 5 separate 4' x 8' beds, I now have two really long beds that run parallel down the center of my backyard.

First, on Friday evening I removed the wheat straw and cardboard mulch from the ground between the four-foot widths of the beds. There were MANY worms beneath the mulch and the soil looked very rich.  I took a pitchfork and loosened everything.  I let the freshly exposed mounds of soil sit exposed for two days.  Second, on Sunday I re-forked the mounds and removed every clump of grass and weed I could find.  Third, I framed in the newly dug areas with untreated whitewood 2 x 8 planks (same type of wood I used to construct the original beds).  I used outdoor wood screws to fasten everything together.

Extending and joining my raised vegetable beds.
I am going to let the newly framed in areas sit exposed to the elements for a few weeks.  I will then remove anything that germinates, re-fork the soil, add a thin layer of wheat straw, then fill the remainder of the spaces with compost.

By doing this I added an additional 4' x 11' growing area, which equates to adding a sixth 4' x 8' raised bed and an extra 4' x 3' raised area.  If you look at the title picture of the blog, imagine the left two beds joined together and the right set of beds joined together while maintaining the original pathway down the center of the yard.  I'll take an overall picture when the work is completed in a few weeks.

I maintained the original dividing walls between each bed in order to maintain distinct growing spaces within the two larger raised areas. This will be helpful when planning crop rotation to prevent the buildup of certain diseases within the beds.  I will simply move the crops from one divided area to the next based upon accepted practices.  For those of you interested in good guidelines for crop rotation and succession planting, you should read chapter 7 in the New Organic Grower by Eliot Colelman.

Sunday, February 27, 2011

A Post About Compost

I finally got some motivation this weekend and built a compost bin for the garden.  I pulled out some salvaged lumber and bought a few pieces from the hardware store and went at it.  I used outdoor wood screws instead of nails because I had a bunch leftover from when I built the raised beds.  I didn't follow any plans, but I didn't deviate far from the norm.

New compost bin.
The bin is 4 feet wide, 4 feet tall, and 3 feet deep.  I was going to build it 4 x 4 x 4, but then it would've been difficult to turn the compost in the back of the bin.  It also would've partially obstructed access to the nearby table.

Front view of the compost bin with slats partially removed.
I built two sets of guides to secure removable wood panels on the front.  The panels slide into the guides and stack on top of each other. I hope this will facilitate easy access to the finished product.  Here's a picture that should make more sense than my rambling description.

Guides for front panels of compost bin.
A few years ago my parents gave me a compost tumbler for Christmas.  The thing works great and produces really nice compost in a fairly short amount of time.  The only real drawback is the size of the unit.  It's not capable of producing large volumes of compost that I need in the new garden, hence why I built this large bin.  I plan on keeping the compost tumbler to produce smaller batches on the side and ultimately to store any extra compost from this large bin if I don't use it all at once.  Currently the compost tumbler is about half filled with a great batch of compost that will find its way into the garden in a few weeks.

New compost bin next to the compost tumbler.  Note the large difference in size.  
I read that it's a good idea to coat the wooden compost bin with a wood preservative or stain to prevent fast deterioration.  None of the wood is pressure treated and only some of it is rot-resistant hardwood. I would really like to get some feedback on what coating(s) others have used to seal wood in a compost bin.  I don't want it to deteriorate within a year or two.

Tuesday, February 22, 2011

Benefits of Winter Protection

This is the first year I've used my low tunnel/hoop house hybrids.  I installed them on January 16.  Now I'm seeing substantial benefits just over a month later.

Two varieties of chard under winter protection.
The picture above shows the drastic change of condition in the health of my chard.  Every chard plant appeared wilted and dry when I first installed the low tunnel.  You can still see the original dead leaves on the ground.  I deliberately left them in place hoping that new growth would emerge from the crowns if they received enough protection from the cold.  Sure enough, here it is.  Large and lush new chard leaves are growing through the old leaves, just like a phoenix rising from the ashes.  That may be a dramatic comparison, but the difference in results between leaving plants to fend for themselves or offering them winter protection is also dramatic.  And best of all it means fresh produce in the middle of February.

Arugula thriving under a protective covering.
The arugula is most surprising.  Not only has it flourished in the low tunnel, but now it's gone to seed.  Clearly there is enough warmth for growth, and in this case almost too much warmth.  Check out the closeup pic of the emerging bloom.

Arugula blossom(s).
I also started lettuce from seed.  Lettuce seed can germinate at fairly low temperatures, but the winter protection moderates the effects of hot and cold weather and has definitely helped with germination.  The trick is making sure to expose the young seedlings to rain or provide enough supplemental water with a hose.

Marvel of Four Seasons lettuce seedlings.
These lettuce seedling are only a few days old.  I should be harvesting fresh heads of lettuce in March or early April if I can keep them well watered and growing at a steady rate.  After harvest I will amend the soil and transplant warm-weather crops (started earlier from seed) to keep the space in continuous production.

Monday, February 21, 2011

Signs of Life

Spring is around the corner.  At least that's what the plants in my yard keep telling me.  I noticed signs of life all over the garden as I worked in the yard this weekend.  Here are a few pictures of plants beginning to awaken at .09 Acres.

Young leaves on a rose cane.
Redhaven peach stem.  The two round growths are flower buds that will emerge pink.  The center growth  will be a new branch.
Growth at the base of a Fall Gold raspberry.
New canes emerging from a Kiwi Gold raspberry.
I certainly hope we don't have any more severe cold spells that may damage more sensitive things like peach blossoms.  What about your gardens?  Do any of your plants agree with Punxsutawney Phil?

Sunday, February 20, 2011

Garlic Uprising

The garlic is up.  And rising.

Garlic with a thin layer of wheat straw mulch.
It got off to a really slow start since I planted it later in the fall than I had intended.  But the garlic is now making a strong showing despite my inability to keep to the schedule, and despite over a foot of snow (rare in this area) and long periods of below-freezing temperatures.

We've had a very warm week (temps in the 60s and 70s) and now the garlic is reaching for the sky.  I'm not overly concerned about any future frosts or snow before the weather permanently warms up because garlic is very hardy.

Inchelium Red garlic.
Note how each new leaf grows from the center.  You can get a fairly good estimate of how many cloves make up the overall bulb of garlic by counting the number of leaves.  Every leaf corresponds to a clove. It means that this little plant, which started from a single clove, is now composed of three cloves.  It also means that this plant has alot more growing to do before harvest later in the year.

Wednesday, February 16, 2011

A Berry Good Trellis

I hate to admit it, but prior to 2009 I had never eaten fresh raspberries or blackberries off the vine.  At least not when I was old enough to remember it.  I had only eaten berries from the store with a flavor I would describe as "meh, average".  Two years ago I decided to visit a nearby pick-your-own berry operation (Barry's Berries and Jan's Jams at Rose Tree Hill Farms) about an hour from the house.  I thought it would be fun to pick berries.  I was absolutely blown away when I tasted fresh raspberries and blackberries right off the vine.  I knew at that moment I would one day plant cane berries in my backyard.  I didn't have a choice.  The flavor of the berries compelled me!

Last spring, I planted a few different varieties of berries down one side of my yard.  I selected Heritage Red raspberries (3 plants), Fall Gold raspberries (2 plants), Ouachita blackberries (3 plants), Arapaho blackberries (1 plant), and Triple Crown blackberries (1 plant).  They were young plants from small containers, and they grew fairly well. The raspberries even produced a few handfuls of berries.  The blackberries did not because they only fruit on second year canes. They are also thornless varieties.

As they grew, they started to bend over.  Most of them were either growing along the ground or close enough that when it rained they would be covered in mud.  I had other projects to work on at that time, and building a berry trellis was low on my priority list.  I just wanted the plants to establish a good root system.

Last weekend I set three 4"x4" posts 30" deep in the ground.  I placed a shovel-full of coarse gravel at the base of each hole to help with drainage and used a bit of quick setting concrete in each hole.  I pre-drilled the edge posts with holes for hardware and drilled holes all the way through the middle posts where I could run the wire rather than attaching more hardware.

Three-tier berry trellis for blackberries and raspberries.
I used galvanized wire (can't remember what gauge) and turnbuckles to put appropriate tension on the wire.  It's nearly impossible to hand-tighten 30-feet of fairly substantial wire.  Just can't do it.  The turnbuckles make it an easy chore and I can adjust them at a future date if I need to. Why wire, turnbuckles, and other heavy duty stuff? The plants will eventually be so heavy with fruit that anything less would sag and eventually fail.

Turnbuckle.
Additional hardware to keep the other end of the wire from slipping.
I repeated this same setup for each strand of wire.  The first wire is roughly 18" off the ground, the second is close to 36", and the third wire is close to 60" high to provide even support.  I then carefully lifted the blackberry canes and loosely tied them to the wire.  I did the same with the raspberries (which grow shorter than the blackberries), and was careful with them to avoid the tiny little spines/spikes all over each cane.  I still need to paint the posts to protect them from the elements.  Aside from that, the trellis is basically complete.

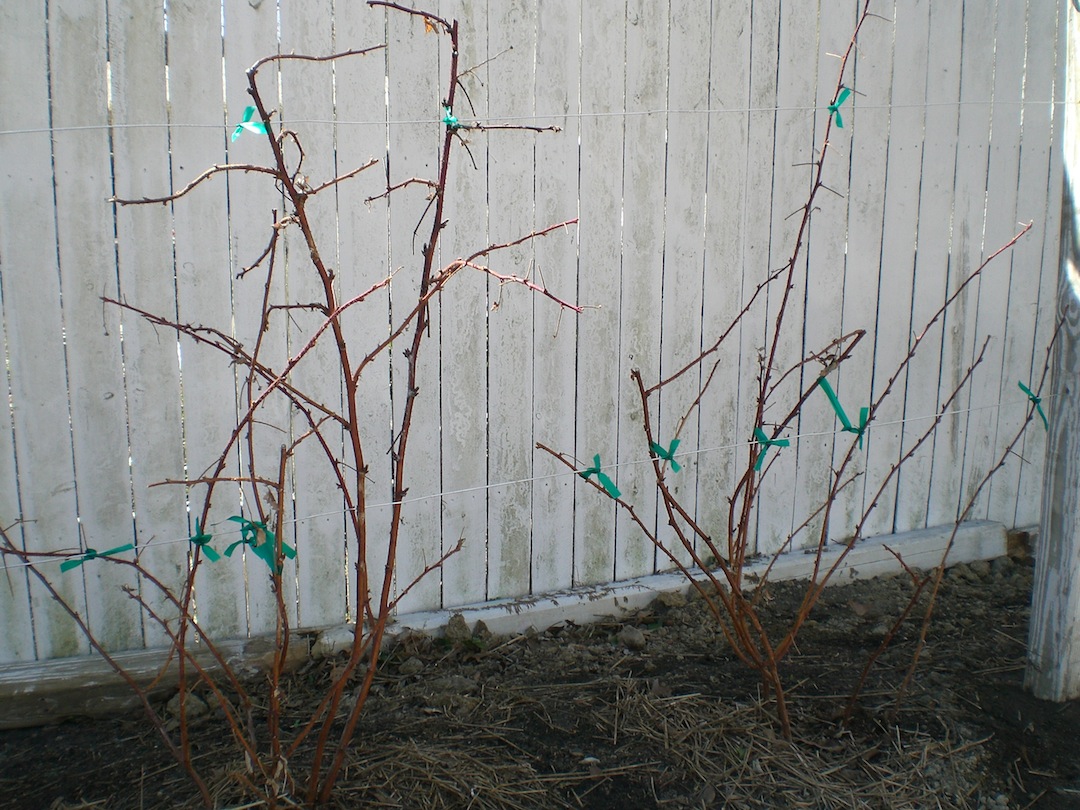
Heritage Red raspberries loosely tied to the first and second tier of the berry trellis.
Ouachita blackberry plant attached to the trellis.
Although I call it a "berry good trellis", it may not necessarily be the best trellis.  The varieties of blackberries I planted are biennial.  This means that the first year of growth for each cane doesn't produce berries.  They only flower and fruit the second year.  How does that impact the trellis design?  Well, it would probably be easier if I had two separate sets of wires.  I would tie new canes to one set and harvest fruit from second year canes on a separate set of wires and repeat each year.  I will probably end up letting the new canes grow and trail, and I'll only tie them to the trellis after I have harvested berries and removed the second year canes in the fall.  The raspberry varieties I planted are everbearing, meaning they produce fruit in the summer on second year canes, and in the fall on first year canes.  I will tie all raspberry canes to the trellis.

There's one additional advantage to the trellis.  It'll be alot harder for my dogs to pull berries off the plants.  I caught both dogs eating raspberries off the canes last fall.  The sweet berries must've been worth the pain because those raspberry canes are sharp!

And here's one last thought.  If you've never eaten a fresh yellow/gold raspberry, try to find a place that grows them.  Your taste buds will thank you.

Monday, February 14, 2011

Starting Seeds

It's almost seed starting time.  With that in mind, I spent some time over the past few days readying my seed starting operation in my shed.  It's a fairly simple operation with only 4 ingredients: seeds, seed starting mix, heat, and light.  Fortunately I have saved many seeds from the past few growing seasons so I've got that covered.  I also have leftover sterilized seed starting mix.  It retains moisture but also drains well.  And last spring I decided to get serious and devote a few bucks to the heat and light portion of this equation.  What did I buy?  Heat mats and simple fluorescent light fixtures.  Nothing too fancy.  One heat mat was also a gift, thanks Frank and Robin.

From top to bottom: two 4-foot fluorescent light fixtures, seed trays, and heat mat.  
The first photo is my exact setup from last year.  This year I wanted to expand the operation to grow even more plants so I doubled it.  I now have two heat mats that hold four seed trays (8 total), four light fixtures (each holds two bulbs), and timers for the lights.

I had trouble fitting the whole setup in a single picture so I opted for this view.  Not a great shot but it gives you an idea of what it looks like.
Automated timer.
The automated timer makes everything easy.  I can program it to come on early and turn off late in order to provide maximum light for my UV-hungry seedlings.  I don't have to get up early or stay up late to fiddle with lights.  You can call me lazy, but I call it efficiency.  I also like to keep the lights very close (within a few inches) of the seedlings. Strong light leads to thicker, sturdier, stronger plants.  Low light leads to weak, spindly plants.  The lights are on chains so I can raise them incrementally as the plants grow taller.

You can also buy thermostats to control your heat mats. Unfortunately I don't have thermostats so I keep a thermometer and humidity gauge nearby for reference.  It's not the most accurate gizmo but it's a good reference.

Pick one of these up at your local hardware store.
I'm still trying to sort out what I will start in the seed trays.  Definitely the longer growing season staples like tomatoes, peppers, etc.  I usually transplant those to slightly larger containers and place them back on the heat mats for further growth before planting them outside. I also plan on starting lettuce and other veggies.  I don't recommend growing root veggies like carrots, beets, or radishes in trays.  They do better when directly sown in the garden.  And fast growing plants like cucumbers aren't usually worth growing in cells.  I also sow those directly outdoors.

What do you do to prepare plants for the upcoming season?  Peat pots, cups of seeds on a bright windowsill, pots outdoors?  Wait for warmth and plant in the garden?  I'd love to hear from you.  I'll post again after I start the process and germination is underway.

Friday, February 11, 2011

Tabs!

I finally added informational tabs to the blog. They are located just beneath the title near the top of the blog.  One is a brief page about the evolution of the property and is called "Evolution of .09 Acres". The other tab is more detailed and discusses "What's Growing".  Also a few pictures for good measure.  Check out these new features and enjoy.

Tuesday, February 8, 2011

Espalier Fig or Stepover?

I've been attempting to espalier a Celeste fig against the corner of my shed since last summer.  It's a young plant so I've had some success with the flexible new growth, but I've got a long way to go.  The following picture shows the tree in mid-summer 2010.

Fig in early stages of espalier training.
When I first planted it I thought "Okay, I'm going for an espalier." Most of you probably know it's a bit more time-consuming than that.  My first mistake was not building a strong framework to guide the plant's growth.  I got lazy and simply dug a few metal supports into the ground and tied down the growing limbs with string.  I know most plants want to grow upward, but I was still surprised when the young limbs were strong enough to pull my supports out of the ground.

Note that the lowest limbs are generally horizontal to the ground.  I say "generally" because the nice lush leaves hide alot of my mistakes. The top 2/3 of the plant grew last summer.  Talk about some serious growth.

I finally wised up this past weekend and built an appropriate "ground level" support/frame for the lowest limbs.  I drove 2-foot cedar stakes into the ground and used a plastic coated metal pole for the horizontal guide section.  I used plastic ribbon to firmly secure the pole to the posts. I then pulled down the wayward growth and secured it tightly (but with enough slack/space to allow for growth without strangling the limbs) to the horizontal pole.

Cedar stakes and horizontal pole to train lowest limbs.
I didn't build a massive structure because I'm still deciding whether or not I want to have a multi-tiered espalier or opt for a stepover.  A stepover is essentially a 1-tier espalier close to the ground.  I'm thinking that I'll probably go with a stepover because individual fig limbs can grow multiple feet in a season.  All new growth starting close to the ground will have plenty of vertical space for full growth. It also means I'll prune the central leader back to the level of the horizontal limbs.  And the greedy ants will likely thank me for creating orderly tightropes that lead to tasty figs in late summer.  Sybil knows that it's a race between human and ant when fig harvest begins!

If I opt for a stepover, I will cut the central growth you see at the corner of the shed.
If you think I'm crazy for considering cutting off such lush growth, you need to check out the following pictures of stepover figs in Japan. They get multiple feet of growth per growing limb each season and the farmers heavily cut back each limb every winter, leaving a unique appearance.

Vertical summer growth from a stepover fig tree trained horizontally.  You can also see small figs in this picture.
Lush stepovers in active growth.
Stepover figs in the fall after leaf drop.  Note the massive limbs that grew during the main growing season.
Here is a set of heavily pruned stepovers.  They don't necessarily look pretty, but they are extremely productive in a relatively small growing space.
What do you guys think of this?  Does anybody have experience with espaliered fruit trees?  Do you have any pictures, links, or suggestions to share?  Let me know, I'd love to hear from you.

Monday, February 7, 2011

Laying Down the Law(n)

I know I've said it before, but I'm done with mowing.  No more.  Finis.  With that in mind, I have been making a concerted effort over the past few weeks to kill the grass and weeds in my backyard.  I don't want to use chemicals, out of the question.  I don't want to dig and till and pull, too much effort.  Smothering is the name of the game, or at least it's what I'm attempting to do with wheat straw, cardboard, and mulch.

Layers of wheat straw, cardboard, more straw, and a few inches of mulch on top of grass and weeds.
It rained all day Saturday.  Rained hard.  Most sane people were inside staying warm and dry.  I'm not sane.  I moved 4 cubic yards of mulch from the city compost facility in 1 yard loads, then shoveled it into a wheelbarrow and carted it into my backyard.  I couldn't think of a better way to spend 7 hours on a Saturday.  Like I said, I'm not sane.  Sanity doesn't run in the family.  I remember watching my 75-year-old grandfather climb a tree with one arm while holding a chainsaw with his other arm.  I also remember my dad mowing the lawn at night after a long day at work.  I figured moving mulch in the rain wasn't out of the ordinary.

For a few weeks my strategy involved spreading wheat straw all over the portions of grass I wanted to smother.  I followed that up with layers of thick cardboard.  I made sure to  provide significant overlap from piece to piece to avoid gaps in the coverage.  Then I added another layer of straw and finally a thick 3-4" layer of fresh mulch.

My dog, the ever loyal sentinel, inquisitively patrolling his new turf.
I did not have enough cardboard or mulch to complete the whole process, but I finished approximately 70% of the yard.  I deliberately avoided putting down mulch in the areas between raised beds.  I intend to join those sections of beds to create a longer growing area.  Yes, I'll lose the convenience of being able to walk between the individual beds, but I'll gain the extra planting space and I'll just have to take a few more steps to reach the other side of the beds.  Essentially, I'll have 2 very long beds instead of smaller ones.  It's a small yard so every inch of growing space is at a premium.

Un-mulched area between two raised beds.  The top left bed contains kale and the lower right bed contains carrots.
I plan on using the same type of untreated 2x8's to enclose the un-mulched sections for planting.  I'll likely plant the new spaces with tomatoes since I planted the majority of beds with tomatoes last summer.  This will provide me with some additional rotation space and will prevent the buildup of pests and diseases in last year's locations.  

Overall shot of newly mulched area of yard.  Pomegranate tree branches in right foreground.
I'm gambling on the idea that layer upon layer of mulch will smother the grass and weeds. The concept is also quite similar to lasagna gardening.  I have no doubt that grass and other things will conspire against me and grow, but I'm hoping for the best.  In the photo above, I still need to mulch the area between the covered beds and white fence, the area in the back right adjacent to the shed, and the area behind and to the left of where I was standing when I took this photo.  I will post more about my plans for the area near the white fence at a later date this winter or early spring.  Think fig trees...