Showing posts with label Garlic. Show all posts

Thursday, January 19, 2012

Back in the Garden Again

My apologies!  It's been well over a month since my last post. The holidays and an INTENSE workload really put a dent in my gardening and blogging time. In the past 6 weeks I've done little in the yard and nothing with the blog.

Considering my neglect of the garden during this period of time, I expected Mother Nature to force me to tighten my belt a notch or two by wreaking total havoc on my tasty veggies and herbs. I imagined hard frosts, harsh winds, and cold dry air conspiring against me. I pictured languishing lettuce, crusty carrots, and beat up beets.

What did I find? Beautiful broccoli.

Calabrese broccoli head approximately 8" in diameter. This plant was grown in a glazed ceramic pot.
Don't think broccoli is beautiful? How about now?

Calabrese broccoli head.
This head of broccoli looks almost like a coral reef you'd expect to see off the Florida Keys rather than in a backyard garden in Newport News, Virginia. This plant was grown from seed in a large glazed ceramic pot. I mulched it with a thick layer of wheat straw after it germinated and haven't fussed over it since then. Yes, I hand-picked a few caterpillars but did little else. It is also growing smaller side shoots that I will only cut after I harvest the main head.

What else did I find that I didn't deserve? A cool cover crop.

Diego standing guard over a 4' x 8' bed of winter rye and hairy vetch cover crop.
I purchased Wren's Abruzzi Winter Rye and Hairy Vetch cover crop seeds last September from Southern Exposure Seed Exchange at the Heritage Harvest Festival at Monticello. I mixed and planted them in a 4' x 8' bed previously occupied by my Inchelium Red garlic. The seeds germinated easily and very quickly filled the bed. It's a vibrant addition to the otherwise muted colors of the winter landscape. I plan to cut and till the cover crop into the bed in early spring before planting tomatoes in late spring.

The cover crop is also important for another reason I did not anticipate. Dogs are natural foragers, and my two dogs often ate grass in my previous yard to aid in digestion. By successfully smothering my grass, I unintentionally eliminated one of their favorite diet supplements. Last summer, I often found my dogs sampling different weeds and other greens because they were looking for a suitable substitute for their favorite but now missing forage. As soon as the cover crop germinated and grew, Diego would regularly run over to the bed and dine on selected shoots of Winter Rye. He still does, seems to love the stuff! So in a way, it's a happy system. Soil feeds cover crop; cover crop feeds soil, dog, and future plants; plants feed human; human feeds cover crop to the soil; repeat. My only concern is that Diego doesn't get comfortable dining on whatever he choses from the raised beds. That could be a problem.

Maybe I'll construct a bone-shaped raised bed for dog edibles...then again, maybe not.

The broccoli and cover crops are just two of the many reasons why Diego and I are beginning to appreciate winter gardening more than summer gardening. There is little to do after planting and germination other than to harvest the rewards of Mother Nature. No toiling, no tilling, no sweating.

Many other veggies are doing very well despite my neglect, but I'll save them for another post. Hope all is well in your gardens.

Saturday, June 18, 2011

Garlic Harvest

Raised bed of Inchelium Red garlic in mid-May.
I harvested my Inchelium Red garlic about 2 weeks ago. Some of the stalks were starting to lean over and were laying on the soil. The bottom-most 5 or 6 leaves were also brown and dry. I'm not a garlic expert, but I've used these signs in past years to determine when to harvest and I did the same thing this year.

Dry and brown lower leaves on garlic plants.  This photo was taken around June 1.
I actually used a fork (think flatware not pitchfork) to dig up each bulb. I'm not sure why I used a fork. I guess it's because I found an old fork in the garden shed and figured "Why not?!" It worked quite well, and I gave a nod to MacGyver. After harvest, I placed all the bulbs (approximately 50) in my shed for about 2 weeks to cure. I hung them from the rafters, cracked the windows, and ran a box fan to provide ventilation.

This is my third harvest of garlic, and first at .09 Acres. I figured I should do something special to celebrate the occasion. I went online to figure out how to braid garlic. I found a lot of sites with various diagrams, contradicting information, and mostly confusion. I learn by watching and doing so I fired up YouTube and found this decent video (http://www.youtube.com/watch?v=2EIzZ3hAn9s) by Christi Wilhelmi of Gardenerd.com. I set aside about 1/3 of my cleaned and cured harvest and went to work. The results weren't stellar, but I started to get the hang of things.

My first attempt at a garlic braid.  These are my biggest bulbs and I will likely save them for next year's planting.  That's one reason I used them for my trial braid.  The other reason is that they have fairly thick necks and were more difficult to work with.  I wanted to save the easy stuff for last!
The trick is to keep a very tight braid as you introduce new bulbs to the braid. The other important thing to remember is that you won't produce a textbook garlic braid on your first attempt. I had the occasional bulb slip loose, I dropped one on the floor and scared the heck out of my dog that was sleeping nearby, and a rogue spider or two crawled from the pile of cured bulbs. All minor problems. After tying the top of the braid and making a loop for hanging, I worked up the courage to start my second braid with the remainder of my Inchelium Red garlic.

My second braid of Inchelium Red garlic.  Again, not textbook in appearance, but not bad either.  
Some of the bulbs aren't tightly spaced with nearby bulbs. There is also a bit of dirt on a few bulbs that I still need to remove. But other than that, I think it was a pretty successful first attempt at braiding garlic. Now I've got the pleasure and pride of hanging this beast in my kitchen. Garlic anyone?

Thursday, June 9, 2011

Early June

I'm back.  It's been almost 2 months since my last post.  Too long. Figured I'd do a big pictures post from the yard.  It's been an interesting and productive Spring, with a few setbacks as well. Generally speaking the garden is doing great.  Let's start with the good then I'll move on to the bad and ugly.  I successfully saved seed from my Vates kale and two varieties of Swiss chard.  They get tall when they bloom.  I'm talking 6-feet tall!  I added about 4" of fresh compost to each bed and built a small extension designated for herbs. Cucumber production has been nothing short of amazing.  I've got 5 Burpless plants in the ground and I'm pulling about 8 cukes/day.  I planted borage as a companion plant to my tomatoes, and it  is growing very well.  Beautiful flowers and they are edible too.  Peaches are hanging from the tree, the pomegranate is still in bloom. Raspberries were a tasty treat for about 3 weeks and are slowing now, but the blackberries are starting to kick in.  Figs have also put on new growth and, more importantly, many figs.  Not as many as I hoped for, but I pruned them back in early spring to encourage more branching for larger future harvests.  The fig espalier is developing fairly well.  I also just finished harvesting approximately 50 heads of Inchelium Red garlic and they are drying in my shed.  That's a short version of the good.

Now for the bad.  My precious, beloved, sacred, and coveted heirloom tomatoes are taking a beating.  They grew well for the first 6 weeks after I transplanted them into the garden, and they grew large.  I'm talking appx. 4-5 feet tall.  Then I started noticing what I believe to be blight.   It first appeared on a few leaves, then a stem, a truss of tomatoes, an entire stalks.  I quickly pruned those areas, sterilized my pruners, and then moved to the next plant.  But it kept moving.  So this past weekend and evening I ripped out 5 of my 7 in-ground tomatoes.  2 German Johnson, 1 Black from Tula, 1 Bull's Heart, and 1 Marvel Striped. I don't know why it hit so hard.  I immediately tossed them in the garbage bin.  I've been careful about watering, 2 doses of organic foliar feed (spaced 4 weeks apart) in the early morning, etc. etc., but I guess a large harvest like last year wasn't meant to be.  I'm planning on purchasing a few more plants and probably dropping in a few seeds as well, but I'm flat out bummed.

And the ugly.  Despite my best attempt at smothering the grass, it's back.  And lots of it.  Multiple layers of cardboard, 4-5 inches of mulch, periodic hand weeding of the errant shoot of grass, all for nothing.

Alright, enough gibberish!  Let's do the photos, shall we?
This is a mix of the good and the ugly.  Figs down the left, raised beds front and center, berries/peach/pomegranate on the right.  Oh yeah, and grass everywhere...son of a...
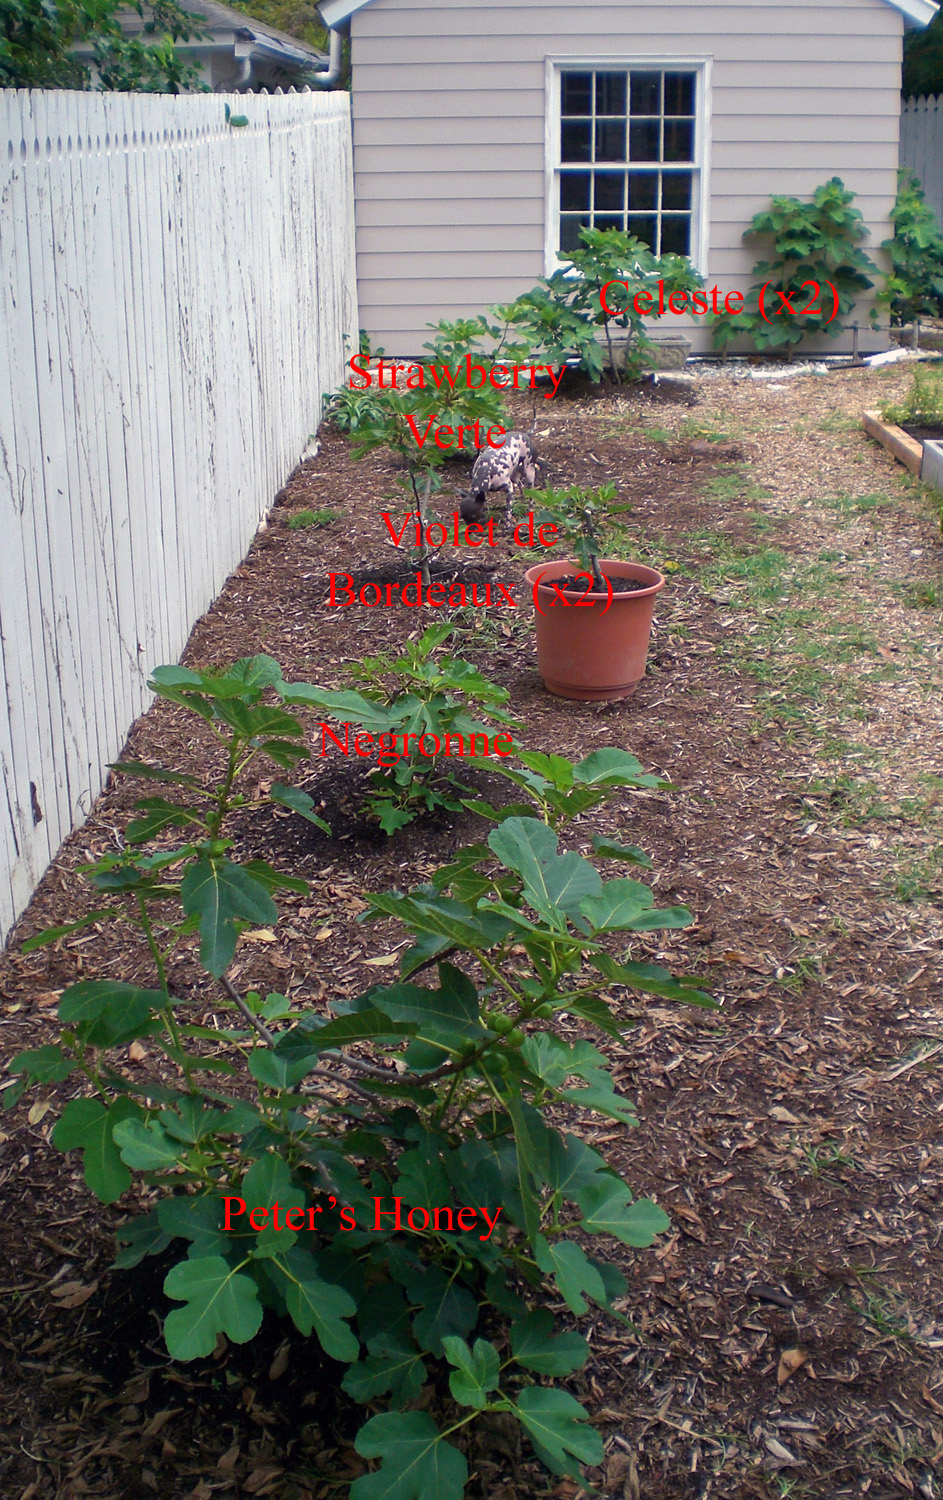
Row of figs down the left wall of the yard.  They are all fairly small, but are adapting well to their permanent location.  I grow a mix of brown, purple, and green figs.   If you look closely, you can spot Scout.  She's the hairless wonder dog.
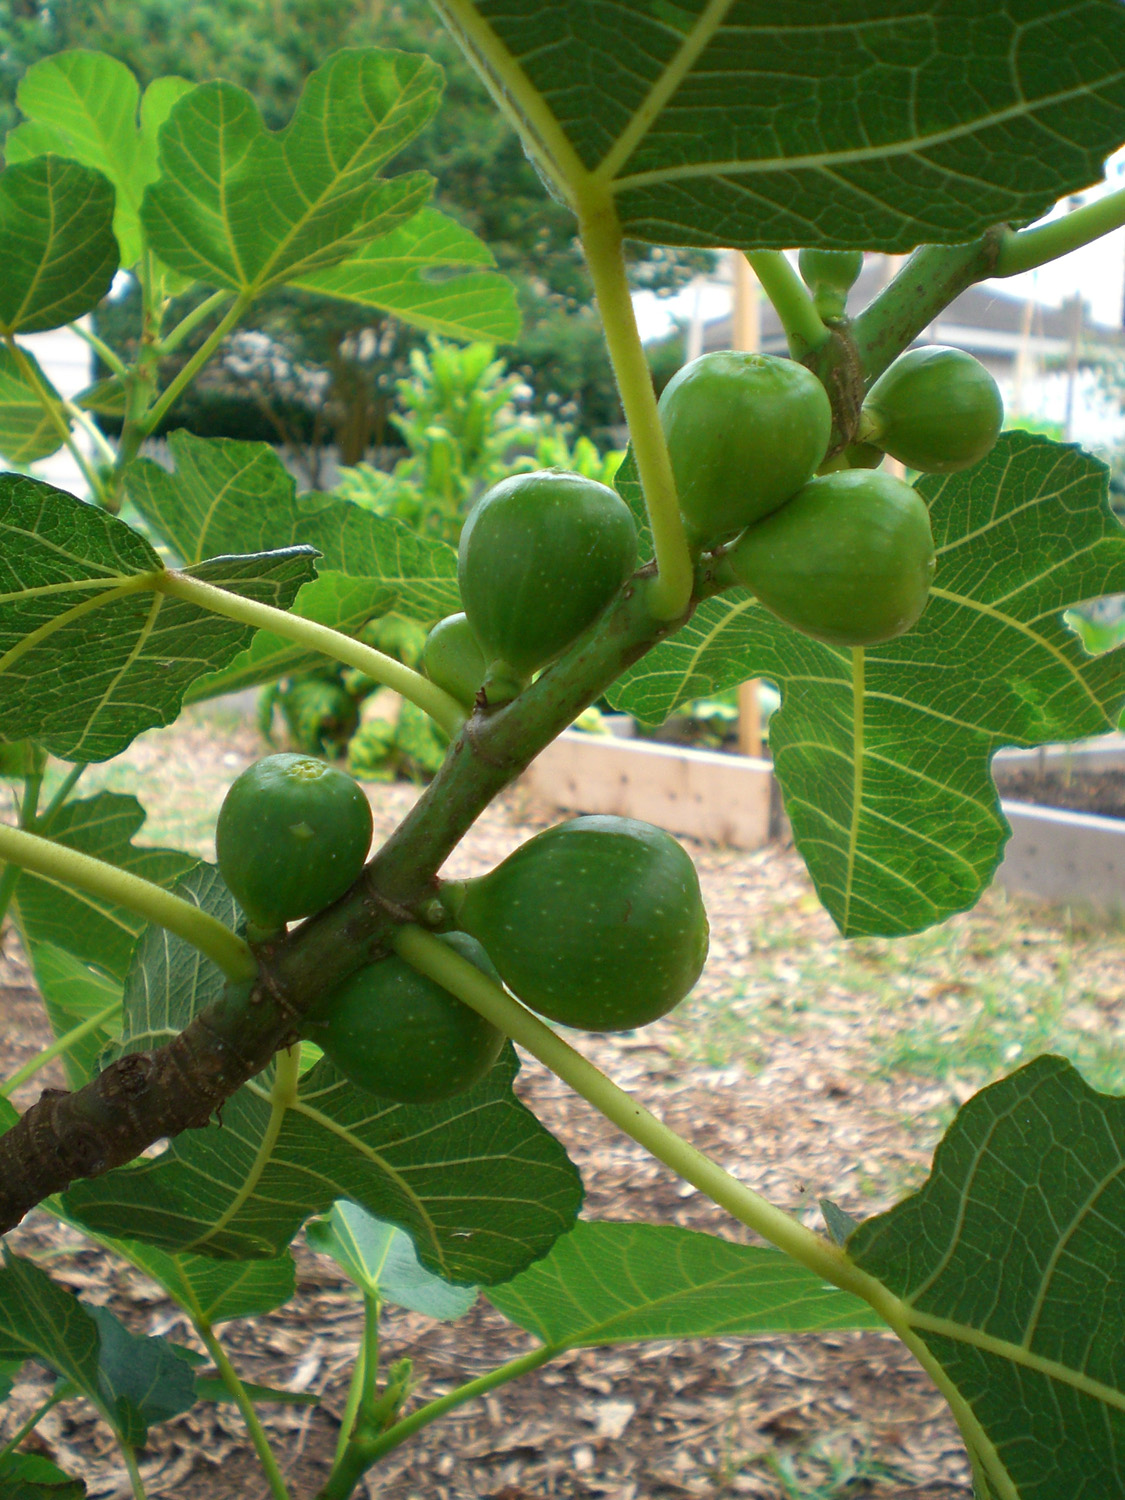
Peter's Honey fig.  In some areas this plant is putting out 2 figs per leaf, and I don't think that's very common. I'm not complaining.
Violet de Bordeaux figs.  I will pick individual ants off the tree to protect these, partly because I'm crazy but mostly because these things are heavenly.
The Red Haven peach tree is getting very large.  I pruned it heavily this winter and again about 3 weeks ago, and it keeps on growing.  I also thinned the fruits a while ago, but it's still hanging about 25 peaches.
Overhead view of the Red Haven peach tree showing the main scaffold limbs.  I'm trying to maintain an open center to allow light in and air to circulate.
I haven't sprayed this tree with a single thing this year and it still looks healthy.  I hope that holds up for the rest of the year.
The Russian Pomegranate also likes its sunny but sheltered location.  It's approximately 7' x 7' and was covered in blooms for 3 weeks.
A tiny pomegranate and a few blooms in the background.
This is a young Haku-Botan pomegranate tree, courtesy of Sybil Mays.  It will eventually produce yellow/gold pomegranates.  Sybil, this is the little plant you dug up from your side yard.  It has recovered and grown ALOT!
It's a cucumber jungle out there.  By now they've established very deep roots and don't show much wilting during the hottest (98 degrees) driest weather this year.
These beasts make a mean cucumber salad.
Ouachita blackberries beginning to ripen.  I'm not sure exactly what happened (or didn't happen), but I think poor or incomplete pollination led to irregularly shaped berries.  Look closely in the picture and you'll see what I'm talking about.
Almost ready.
All the literature says that borage flowers have a cucumber taste.  I disagree.  They taste like borage flowers.  Not really cucumbery, but just a general leafy green pleasant flavor.  I grew these as a companion plant for the tomatoes, but it clearly hasn't helped this season.  
Don't ask me how this partially ripened black cherry tomato tasted.  I wouldn't know.  My dog Diego ate it so you'll have to ask him.  
When most people draw a picture of the devil, they draw a red devil.  The devil is NOT red.  The devil is green.  Check out this mix of Bermuda grass and some other green beasts that are growing well despite Operation Smother.
Bermuda grass a-creepin'.  This is the aforementioned ugly.  I plan on pulling everything I can by hand rather than using some ineffective organic herbicide or crazy poisonous herbicide.  I do not want to mow this back yard ever again.  
I'll post again soon with pictures of the garlic harvest as well as the fig espalier.  How are things growing in your gardens?  If you are fortunate enough to have a bumper crop of heirloom tomatoes later in the summer, I'll likely be begging at your front door. That's a promise.

Sunday, February 20, 2011

Garlic Uprising

The garlic is up.  And rising.

Garlic with a thin layer of wheat straw mulch.
It got off to a really slow start since I planted it later in the fall than I had intended.  But the garlic is now making a strong showing despite my inability to keep to the schedule, and despite over a foot of snow (rare in this area) and long periods of below-freezing temperatures.

We've had a very warm week (temps in the 60s and 70s) and now the garlic is reaching for the sky.  I'm not overly concerned about any future frosts or snow before the weather permanently warms up because garlic is very hardy.

Inchelium Red garlic.
Note how each new leaf grows from the center.  You can get a fairly good estimate of how many cloves make up the overall bulb of garlic by counting the number of leaves.  Every leaf corresponds to a clove. It means that this little plant, which started from a single clove, is now composed of three cloves.  It also means that this plant has alot more growing to do before harvest later in the year.

Sunday, November 7, 2010

Inchelium Red Garlic

Mid-October is the recommended date for planting garlic in my region.  A sequential attack of strep throat, travel for work, and laziness derailed my plan to have my garlic planted at that time.  Now it's three weeks later and early November, but I planted it anyway.  I chose Inchelium Red, a softneck variety, because I've had great success with it in past years.  I know I essentially put all my eggs in one basket by only planting a single variety, but I certainly made up for it with numbers.  I ordered (Southern Exposure Seed Exchange) 16 ounces of this type of garlic this summer and 6 huge bulbs arrived in September.  Today I separated the bulbs into individual cloves (50 total) for planting.  Turns out I only planted 48 cloves because one was soft and mushy and I happened to step on the other.  Oops.  Before planting I dug the 4' x 8' bed with my pitchfork, added a dusting of lime, bone meal, and organic bulb fertilizer (not sure why I added the bulb fertilizer), and mixed everything well.  I then raked the soil flat and marked planting rows by gently pressing PVC pipe into the soil.  Once my rows were established, I placed the bulbs at 6" intervals.

Four rows of Inchelium Red garlic at 6" spacing.  I left some open room in the bed (top of picture) to plant some early spring crops.  Not sure what.  Maybe radishes or lettuce.  I'll have to research what grows well with garlic.  The garlic also grows tall and will shade that area for a few hours each day.
Worm's eye view of garlic cloves before planting.

I used my thumb to make 2" deep holes for each clove and placed them upright in each hole.  Then I smoothed soil over each hole, added a very thin layer of compost, and watered the bed very well.  Hopefully the cloves still have time to establish some good roots before it gets too cold.  I'll likely mulch the bed with wheat straw before winter and add additional mulch in late spring to retain moisture and keep the soil cool during May and June before mid-summer harvest.  I'll try and take pictures when they pop their heads out of the bed and start growing their green tops.

Friday, September 24, 2010

Chard, Beets, Basil, and Garlic

It's been over 2 weeks since my last post, and note the progress in the garden.

Basil (top left), Swiss chard (center), and beets (bottom).
The swiss chard has been growing like a weed, I still have loads of basil, and the beets are starting to thrive.  Carrots are growing well too, but have been more problematic because apparently they are so darn tasty for a variety of worms.  I think they are from butterflies and moths.  Means I have to keep an eye open for those buggers.  I pick 'em and squash 'em when I can find 'em.

It's been very hot here lately (80s and 90s during the day) so I've added a thick layer of straw mulch to the beds.  I think it's helped to keep the soil cool and retain moisture that otherwise would evaporate.  Straw mulch is the best mulch because it's very effective and very affordable.

My garlic also just arrived in the mail!  Nice big bulbs of Inchellium Red, a softneck variety that I've grown with good results for the past 2 years.

Inchellium Red garlic bulbs, before being broken into individual cloves for planting.

I ordered from Southern Exposure Seed Exchange, a great outfit from Mineral, VA.  They grow and sell things well-suited to the Mid-Atlantic.  Hope to plant the individual cloves in October.